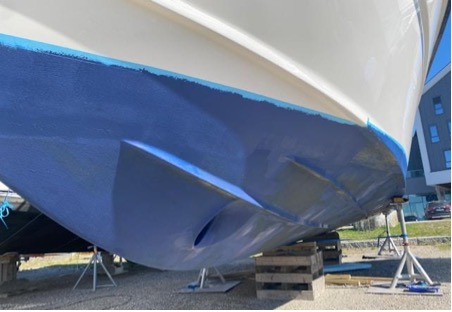
Painting a boat is the single most important maintenance task, protecting the hull from corrosion, osmosis, and marine growth. A correctly done bottom treatment keeps the hull smooth, improves fuel economy, and extends service life by years. A poorly done job, on the other hand, leads to flaking paint, poor adhesion, and costly redoing already the following season.
This guide covers painting a boat step by step: from surface preparation to bottom treatment, from antifouling coating to finishing above the waterline. We also cover the right conditions, drying times, and the most common mistakes that ruin an otherwise good project.
Image name: boat-painting-and-bottom-painting-guide
ALT text: Painting a boat and its bottom step by step with antifouling paint and the right techniques
Why does a boat need painting?
Painting a boat isn't just about improving appearance. The coating forms a protective layer between the hull and the environment, and without it the hull material is exposed to rapid deterioration. On fiberglass, an unprotected surface can lead to osmosis problems, so-called "boat pox." Steel and aluminum start corroding quickly in a salty, damp environment if protection fails. On wood, moisture fluctuation causes rot and cracking.
Below the waterline, painting the boat's bottom with an antifouling product prevents algae, barnacles, and other organisms from attaching to the hull. Growth on the hull's surface significantly increases water resistance: even a thin layer of algae can increase fuel consumption by up to about 10% and drop top speed by several knots. Above the waterline, the coating protects the gelcoat surface from UV radiation and gives the vessel a neat appearance.
Painting is necessary for many reasons. It improves the boat's appearance, but also protects the boat, makes it easier to clean, and improves safety.
Planning a boat painting project and the right conditions
A successful boat painting project starts with planning. A good plan saves time and reduces the risk of mistakes. Before even the first sanding session, it's worth deciding the entire treatment system from surface prep to the final coat. Plan ahead the products needed, the number of coats, drying times between coats, and the weather forecast for your working days.
Temperature and humidity determine the result
A coating job works best at 10–20°C. Drying time always doubles when temperature drops by 10 degrees, and halves correspondingly when temperature rises by 10 degrees. Relative humidity should stay under 65%, though a specific product's manufacturer limits may be higher. A good test is to wet the surface to be treated with water: if it dries within 10–15 minutes, the surface is ready for coating.
Avoid working early in the morning or late in the evening, when the risk of condensation is highest. In direct sunlight, the surface temperature can rise considerably above ambient, leading to too-fast drying and visible application marks. A sheltered, wind-free spot is the best option.
Step 1: Surface preparation
Surface preparation is the most important step in painting a boat. A well-prepared surface guarantees the coating's adhesion, an even result, and a long service life.
Washing and degreasing
Start by washing the whole hull with pressurized fresh water. Remove salt, algae growth, and old detergent residue. Then use a degreaser, such as Hempel Pre-Clean or Hempel Degreaser, to remove oils, grease, wax, and silicone residue. Clean about one square meter at a time with a lint-free cloth, and wipe the surface dry with a second clean cloth. Finally, check for grease: spray water onto the surface. If droplets remain as beads, the surface is still greasy and needs another treatment.
Assessing and removing the old coating
You don't need to remove the old layer completely in every case. If the old surface is in good condition, intact, and firmly bonded, light sanding alone is enough as a key for the new treatment. If the old surface is flaking, blistering, or coats have built up too thick, removing the coating is necessary.
You can use a chemical paint stripper, a heat gun (not for antifouling products), or mechanical sanding for removal. Important rule: old antifouling coating must never be dry-sanded, since the dust released is toxic. Removing antifouling must always use wet sanding and appropriate respiratory protection.
Sanding
Sanding's purpose is to create a suitable roughness on the surface for the new coat to grip. Sandpaper grits vary by situation:
After sanding, remove all dust carefully before the next step. Dust under the coating leads to adhesion problems and an uneven surface.
Step 2: Primer coat
Primer is the first real coat, creating an adhesion base for the treatment and protecting the hull. The right primer choice depends on hull material and the area being treated.
Below the waterline: epoxy primer
Below the waterline, a two-component (2K) epoxy primer is used, such as Hempel Light Primer. Epoxy forms a hard, water-impermeable film that protects a fiberglass hull from osmosis and a metal hull from corrosion. On a new fiberglass hull, 3–5 coats of 2K primer are recommended. There's no need to sand between coats when the next coat is applied while the previous one is still tacky.
After the final epoxy coat, a single-component adhesion primer is applied, such as Hempel Underwater Primer. The adhesion primer ensures the antifouling product bonds properly on top of the epoxy surface, since a cured 2K epoxy surface is very smooth and hard.
Above the waterline: an opaque primer
Above the waterline, a single-component primer is used, such as Hempel Primer Undercoat or International One Up. An opaque primer coat evens out small surface imperfections, improves the topcoat's adhesion, and ensures an even result. Primer is applied to fiberglass, wood, and steel surfaces in 1–2 coats, with a light sanding between coats.
Step 3: Painting the boat's bottom with an antifouling product
Painting the boat's bottom with an antifouling product prevents organisms from attaching to the hull. Antifouling products, biocide-based fouling deterrents, fall into three main types, each with its own use case:
Note that in Finland, using biocidal antifouling products is permitted only in marine waters, and with product-specific restrictions (among others, only for boats over 7m). Use in inland waters is prohibited. Biocide-free alternatives, such as silicone coatings or Sol-Gel-based products, suit inland waters. Always make sure you're using Tukes-approved products and application methods, and check their conditions of use (e.g., boat size). Always check the product data sheet and terms of use before application.
Applying the antifouling product
Apply antifouling with a roller or a wide brush using a cross-hatch technique. Mix the product thoroughly before applying, and also during work as needed, since active ingredients settle to the bottom of the can. The recommended number of coats is 2–3. Apply an extra coat at the waterline and the leading edge of the keel, since water flow and wear are greatest at these points.
Antifouling products generally aren't recommended to be thinned. In very cold weather, thinning by 10% with the correct thinner can ease application. After treating the bottom, the minimum and maximum launch window always follows the product data sheet (typically at least a day, maximum from weeks to months).
Step 4: Finishing above the waterline
Above the waterline, painting a boat is finished with a topcoat, which gives the boat its look and protects against UV radiation. Modern self-leveling products, such as International Toplac Plus, allow an excellent result with just a roller, without spray equipment.
Application uses a cross-hatch technique: first a lengthwise pass, then a crosswise pass in the same spot, and finally a light vertical finishing pass. Quality painting supplies, such as short-nap foam rollers and good-quality brushes, make the difference in the result.
Wood parts, such as teak and mahogany, are treated with marine varnish. Varnish highlights the wood's natural grain and protects it from radiation, moisture, and wear. Varnishing typically needs 4–6 thin coats with a light sanding between coats.
Drying times and coat schedule
Drying times vary by product, temperature, and humidity. The table below shows typical times at 20°C and 60% relative humidity:
Remember: at 10°C, these times double. Don't rush between coats. A next coat applied too early won't adhere properly and can cause wrinkling or the coating lifting.
The most common mistakes in boat painting
The same coating mistakes recur from one boater to the next over the years. Avoiding them saves time, money, and frustration:
Inadequate cleaning and sanding. Grease and silicone residue on the surface prevent the coating's adhesion, even if the surface looks clean. Always clean with a degreaser and test by spraying water.
Working in the wrong conditions. Too cold (under 10°C), too humid (over 85%), or direct sunlight leads to a poor result. The coating won't cure properly or dries too fast.
Applying a hard product over a soft coat. A hard antifouling won't stay on top of a soft coating. Always check the old surface before applying a new coat, and use an adhesion primer as an interlayer if needed.
Dry-sanding antifouling. Antifouling products contain biocides, whose dust is harmful to health. Always use wet sanding and a respirator.
Forgetting the primer. Applying antifouling directly onto gelcoat without a primer leads to poor adhesion and no osmosis protection. A 1K adhesion primer is always needed on top of the 2K epoxy primer too.
Excessive coat buildup. If the old coating has grown thick over the years, it starts cracking and flaking. Remove old coats periodically and start the treatment fresh.
Work safety in boat painting
Coating work always requires proper protective equipment, and safety isn't worth skimping on. Wear safety glasses, chemical-resistant gloves, and a respirator, especially while sanding and applying. Solvents irritate skin and airways, and antifouling product dust can be toxic. Ensure adequate ventilation when working indoors, and don't eat or drink in the work area.
Frequently asked questions about boat painting
How often does a boat's bottom need painting?
Most boaters treat the bottom once a year before the boating season starts. Self-polishing antifouling products wear away during the season and need a new coat for the following season. A new coat can be added on top of hard antifouling coatings, but the old coat's porous surface should be wet-sanded before the new application.
Does the same antifouling suit both the sea and inland waters?
No. Using biocide-based, i.e., copper-based, antifouling products in inland waters is prohibited in Finland. Biocide-free alternatives, such as silicone coatings or Sol-Gel-based products, suit inland waters.
Can copper-based antifouling be used on an aluminum boat?
Generally no, since copper causes galvanic corrosion on aluminum. International Trilux Hard, for example, suits aluminum boats, which according to the manufacturer is suitable for properly pre-treated aluminum on top of at least two coats of 2K epoxy primer.
Does old, good-condition antifouling need to be removed before a new treatment?
If the old surface is in good condition and the same type as the new product, light wet-sanding and applying the new coat is enough. If the surface has flaked badly or you're switching product type (for example, from soft to hard), use a 1K adhesion primer as an interlayer, or remove the old coating entirely.
Why does boat paint flake already in the first season?
The most common causes are inadequate cleaning (grease residue), insufficient sanding, working in conditions that are too humid or cold, or layering incompatible product types. Always check the manufacturer's instructions on compatibility and condition requirements.
Get your boat's coating supplies from Marinekauppa
A successful boat painting project needs quality products and the right treatment system. In Marinekauppa's range you'll find everything needed: primers and undercoats, antifouling products, topcoats for above the waterline, marine varnishes, thinners, and painting supplies. Also check out our antifouling selection guide, where we compare the differences between types in more detail.
Need help choosing the right treatment system? Our knowledgeable staff serve you in our stores in Helsinki's Lauttasaari and Vantaa's Porttipuisto, and in our webshop.
Sources and further reading
Hempel Yacht – Boat Care Guide 2023
Traficom – Boating safety
Finnish Environment Institute – Environmental impacts of boating
Surface to sand | Dry sandpaper | Wet sandpaper | |||
Gelcoat before primer | 80–120 | 80–120 | |||
Gelcoat before topcoat | 150–180 | 240 | |||
Untreated wood | 80–240 | – | |||
Bare metal | 60–120 | – | |||
Previously treated surface (repaint) | 150–180 | 180–240 | |||
Final finish before topcoat | 280–400 | 600–800 | |||
Antifouling type | Characteristics | Best suited to | |||
Hard (e.g., Hempel Hard Racing) | Doesn't wear in the water, can be polished and wet-sanded | Fast boats, competitive sailing | |||
Self-polishing (e.g., Hempel Mille Xtra) | Wears evenly, the layer doesn't build up | General use, a long boating season | |||
Silicone-based (e.g., Hempel Silic One) | Biocide-free, a slick surface prevents attachment | Environmentally friendly option, inland waters | |||
Product type | Touch-dry | Next coat | Cure time | ||
2K epoxy primer | 3–4 hours | 10–16 hours (or while tacky) | 7 days | ||
1K primer | 2–4 hours | 16–24 hours | 3–5 days | ||
Antifouling | 2–4 hours | 4–16 hours | 24 hours before launch | ||
1K topcoat | 2–4 hours | 16–24 hours | 5–7 days | ||
Disclaimer
This guide provides general guidance only and does not replace the product manufacturer's operating, installation, or service instructions. Marinekauppa is not responsible for actions taken based on this guide or their consequences. Always check product-specific instructions and consult a qualified professional if needed.