Wiring a boat's battery is the foundation of
the electrical system, directly affecting safety, reliability, and battery
lifespan. A properly done battery installation includes correctly sized battery
cables, appropriate fuses, a working main switch, and careful separation of
positive and negative wiring. According to the EN ISO 10133:2017 standard, a
boat's extra-low-voltage system must meet safety requirements against electric
shock and fire in all marine conditions.
Why does correct battery wiring matter?
An incorrectly wired battery can have serious
consequences: short circuits, overheating cables, fire, or in the worst case a
battery explosion. According to the Suomen Purjehdus ja Veneily ry (Finnish
Sailing and Boating Federation, SPV) Electrics and Boats guide, electrical
system safety and proper operation are key components of boating safety.
The most important document for a boat's
electrical system is an up-to-date wiring diagram. It provides clarity and
confidence that the boat's electrics are in order.
A properly executed boat battery installation
ensures reliable engine starting, functioning navigation equipment in an
emergency, and a long-lasting electrical system. Also see our comprehensive
boat electrical system guide, which covers the basics of the whole electrical
system.
What components do I need for wiring a battery?
Installing a boat battery requires several
components that together form a functional and safe whole. Every part is
critical to the system's safety.
Essential components for wiring a boat battery
How do I choose the right battery cable size?
Choosing the battery cable's cross-sectional
area is a critical safety factor. A cable that's too thin will overheat and
cause voltage drop as well as a fire risk. According to the EN ISO 10133
standard, conductors must be large enough that the temperature rise doesn't
exceed 30 °C in normal use.
Battery cable sizing
table for a 12V system
Tinned
copper cable is recommended for marine use, as it withstands moisture and salt
water better than plain copper. Marinekauppa's electrical wires and cables are
designed for the demanding conditions of boats.
Conductors
should have a large enough cross-sectional area that current 'fits' through the
conductor without the heating caused by 'congestion.'
How do I correctly
separate the positive and negative wiring?
In a
boat's electrical system, current must be carried out and back on separate
wires, unlike in cars, where the chassis serves as the negative conductor. This
is a critical difference that often causes problems in boat battery wiring.
Positive-side wiring (+)
The
positive wire always runs from the battery's positive terminal through the main
fuse and main switch to the electrical panel. There should be a fuse on the
positive side as close to the battery as possible – per the standard, no more
than 20 cm from the battery terminal. This protects the entire system from a
short circuit.
Negative-side wiring (−)
The
negative wire is connected from the battery's negative terminal directly to a
negative bus bar, from which ground is distributed to all equipment. The
negative side generally doesn't use fuses, but the negative cable should be
just as thick as the positive cable.
Wiring principles
Boat
battery wiring follows these principles:
Positive
side: Battery (+) → Main fuse → Main switch → Positive bus bar → Fuses →
Equipment
Negative
side: Battery (−) → Negative bus bar → Equipment
Every
device should be protected by its own fuse, sized according to the device's
current draw. The main fuse size is determined by the battery cable – for
example, a 35 mm² cable typically suits a 150A fuse.
What does the main
switch do and how is it installed?
The main
switch is the most important safety component in a boat's electrical system. It
cuts power to the entire system with a single turn in an emergency, during
maintenance, or for long-term storage.
Main switch installation
location
The main
switch is installed between the battery and the electrical panel on the
positive side. The ideal location is somewhere easily accessible, from which
power can be cut quickly in an emergency. On many boats, the main switch is
located near the helm or in front of the engine compartment.
Types of main switches
A simple
ON/OFF switch suits single-battery systems. For dual-battery systems, main
switches are available with multiple positions:
OFF – all
power off. 1 – starting battery in use. 2 – house battery in use. BOTH – both
batteries in parallel (emergency starting only).
Marinekauppa's
range includes main battery switches and relays for systems of various sizes,
typically rated for 100–500A.
What's the safe
connection order when installing a battery?
Order
matters for safety when wiring a boat battery. The wrong connection order can
cause sparks, short circuits, or component damage.
Installation order for a
new battery
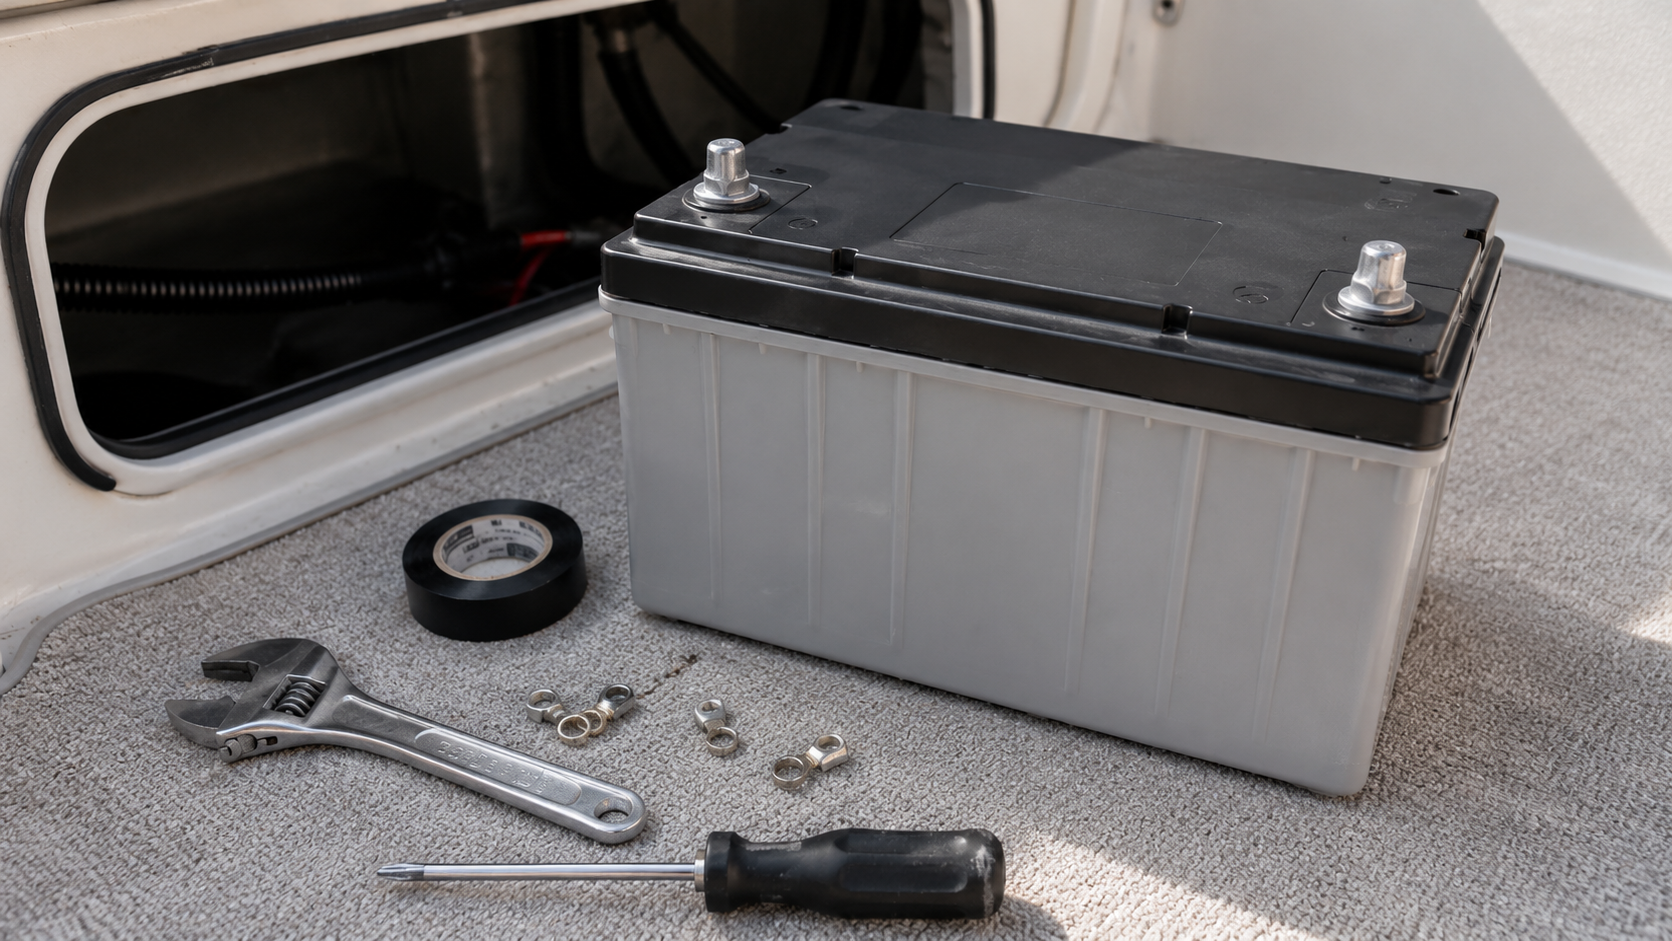
1. Make
sure the main switch is in the OFF position.
2.
Install the battery in the battery box and secure it firmly.
3.
Connect the negative cable to the battery's negative terminal (−) first.
4. Then
connect the positive cable to the battery's positive terminal (+).
5.
Tighten the terminal connectors with a torque wrench (typically 8–10 Nm).
6. Check
the tightness of the connections and protect the terminals with anti-corrosion
grease.
7. Turn
the main switch to ON and test the system.
Disconnection order when
replacing a battery
When
removing a battery, the order is reversed:
1. Turn
the main switch to OFF.
2.
Disconnect the positive cable (+) first.
3. Then
disconnect the negative cable (−).
4. Remove
the old battery and dispose of it properly at a recycling point.
This
order minimizes the risk of a short circuit, since the negative side is
connected to the boat's metal parts in many installations.
How do I wire multiple
batteries in series or parallel?
A
dual-battery system is a common setup where a separate starting battery and
house battery guarantee the engine can start even if the house battery is
depleted. How the batteries
are connected affects voltage and capacity.
Parallel connection (same
voltage, greater capacity)
In a parallel
connection, the batteries' positive terminals are connected together and the
negative terminals are connected together. This doubles capacity while keeping
voltage the same (e.g., 2 × 100 Ah = 200 Ah, 12 V).
A parallel
connection suits situations where you want more runtime at the same 12V
voltage. The batteries should be the same type, capacity, and age to ensure
even loading.
Series connection (higher
voltage, same capacity)
In a series
connection, the first battery's positive terminal is connected to the second
battery's negative terminal. This doubles the voltage while keeping capacity
the same (e.g., 2 × 12V 100Ah = 24V 100Ah).
Series connection
is used in 24V systems, which are common on larger boats and commercial
vessels. In a 24V system, cables can be thinner for the same power transfer.
Wiring a dual-battery system
with an isolation relay
In a dual-battery
system, the starting battery and house battery are kept separate using an
isolation relay or a splitter diode. The isolation relay automatically connects
the batteries during charging and separates them when the engine is switched
off.
Also see our
article on boat battery charging and maintenance, which covers choosing
chargers and charging systems.
How do I safely wire a
lithium battery?
Lithium
batteries (LiFePO4) have become more common in marine use thanks to their light
weight, long lifespan, and fast charging. Wiring a lithium battery differs from
wiring a traditional lead-acid battery in a few important ways.
Special requirements for
lithium batteries
Lithium
batteries have a built-in BMS (Battery Management System) that protects the
battery from overcharging, deep discharge, and temperature-related risks. The BMS can automatically cut the
battery's current in a protection situation.
When wiring a
lithium battery, keep in mind: use a charger suited to lithium batteries, since
lead-acid charging profiles aren't suitable for lithium. A DC-DC charger is
recommended between the engine's alternator and the lithium battery to protect
both. When connecting lithium batteries in parallel, follow the manufacturer's
instructions – generally a maximum of 4 batteries in parallel.
To ensure a safe
installation, we recommend fitting one or more DC-DC chargers in the battery
system.
Differences between lithium and
lead-acid battery wiring
Read more about
lithium battery characteristics in our battery charging and maintenance
article.
Safety instructions for wiring a
boat battery
Handling a boat
battery requires care, since batteries store large amounts of energy and can
cause serious injury or fire if handled incorrectly.
Personal protection
Always wear
safety glasses when handling batteries – a lead-acid battery's sulfuric acid
can cause serious eye injuries. Remove jewelry and watches, which can cause a
short circuit if they get between the terminals. Work in a well-ventilated
space, since lead-acid batteries can release hydrogen gas while charging.
Preparing for fire risk
Keep a fire
blanket or powder extinguisher nearby during battery installation work. Don't
use an open flame or smoke near the battery. Make sure your tools are insulated
– metal tools can cause sparks if they touch both terminals.
Preventing short circuits
Cover the battery
terminals with insulating material while working if you're only disconnecting
one cable. Never place metal objects on top of the battery. Use a torque wrench
to tighten connections – too tight a connection can damage the terminal's threads,
while too loose a connection causes sparking.
How do I protect battery wiring
from moisture and corrosion?
Marine conditions
are extremely demanding for an electrical system. Moisture, salt spray, and
vibration cause corrosion and loosening connections, which are the most common
causes of electrical faults on boats.
Preventing corrosion
Use tinned copper
cables, which withstand salt water better. Protect terminal connectors with
anti-corrosion grease or spray after installation. Use heat-shrink-insulated
cable lugs, which seal the connection. Choose fuses and switches with an IP rating of at least IP67 for damp
spaces.
Vibration resistance
Tighten all
connections with a torque wrench according to the manufacturer's instructions.
Check the tightness of connections regularly, especially at the start of the
season. Use thread-locking compound (Loctite) on screw connections where
needed. Secure cables with cable clamps to prevent chafing.
What tools do I need for wiring
a battery?
Wiring a boat
battery can be done with basic tools, but quality tools make the job easier and
ensure a safe result.
Tools needed
Basic tools: a
torque wrench (8–10 mm socket), crimping pliers for cable lugs, side cutters,
wire strippers, a multimeter for measuring voltage.
Recommended extra
tools: a heat gun for heat-shrink tubing, a battery acid refractometer (for
lead-acid batteries), anti-corrosion spray, marking tape for wires.
How do I find and fix wiring
faults?
Troubleshooting a
boat's electrical system always starts with the battery connections. Over 80%
of marine electrical faults are caused by poor connections, corrosion, or
incorrectly sized components – not the devices themselves.
Common wiring problems and
solutions
Engine won't
start or cranks slowly: Check the tightness of the battery cables – a loose
connection causes voltage drop, seen as slow cranking. Measure voltage directly
at the battery terminals and compare it to the starter motor's terminals. The
difference shouldn't exceed 0.5V while starting.
Equipment doesn't
work even though the battery has power: Check the main switch position and fuse
condition. A blown fuse is often visible on inspection, but sometimes the fault
is invisible – measure voltage across the fuse with a multimeter. Also check
the negative-side connections, since poor grounding is a common problem.
Battery drains
quickly: Measure parasitic draw by disconnecting the positive cable and
connecting a multimeter (current measurement) between the battery and the
cable. A leakage current over 50mA indicates a fault – disconnect fuses one at
a time to find the leaking circuit.
Corrosion at
connections: Clean terminals with a wire brush or fine sandpaper. Treat with
anti-corrosion grease and make sure connectors are tightly fastened. Severe
corrosion requires replacing the connectors.
Measuring voltage drop
In a
well-functioning system, voltage drop from the battery to the electrical panel
is under 3% (in a 12V system, under 0.36V). Measure under load, for example
while starting or with the bilge pump running.
If voltage drop
is too high, check the tightness and cleanliness of all connections. A cable
that's too thin or a long cable run also causes loss – compare your
installation to the sizing table.
Frequently asked questions about
wiring a boat battery
Which terminal do I connect
first – positive or negative?
When installing,
connect the negative terminal first, then the positive terminal. When
disconnecting, disconnect the positive terminal first, then the negative
terminal. This order minimizes the risk of a short circuit.
How close to the battery must
the main fuse be installed?
According to the
EN ISO 10133 standard, the main fuse should be installed no more than 20 cm
from the battery's positive terminal. The closer the fuse is to the battery,
the better it protects the entire cable from a short circuit.
Can a lead-acid and a lithium
battery be connected to the same system?
Connecting a
lead-acid and a lithium battery in parallel isn't recommended without an
isolation relay or a DC-DC charger. The different charging voltages and
discharge curves of the battery types can damage the batteries and shorten
their lifespan.
Does the negative side need a
fuse?
Generally no. The
negative side doesn't need a fuse, since the positive-side fuse protects the
entire circuit. The exception is systems where the negative wire runs a long
distance separate from the positive wire.
How do I test that the battery
wiring works?
Measure voltage
at the battery terminals with a multimeter and compare it to the voltage at the
electrical panel. Voltage drop under load should be under 0.5V. Battery
monitors make ongoing system monitoring easier.
What do I do if the battery
doesn't charge properly?
Check the
tightness and cleanliness of all connections, since poor connections are the
most common cause of charging problems. Measure the charger's output voltage –
it should be 14.2–14.8V (12V lead-acid) or 14.2–14.6V (12V LiFePO4). Check our
battery chargers and make sure the charger suits your battery type.
How much does professional
battery wiring cost?
Professional boat
battery installation typically costs €100–300 depending on the scope of the
system. Installing a dual-battery system costs more than a single-battery
system. Component costs come on top of that.
Wiring diagram: a simple
single-battery system
Basic system for
a single-battery boat:
Battery (+) →
Main fuse (150A) → Main switch → Positive bus bar → Equipment fuses → Equipment
Battery (−) →
Negative bus bar → Equipment
The main fuse is
installed as close to the battery as possible (max 20 cm). The main switch is
placed somewhere easily accessible. Each device gets its own fuse in a fuse block or box.
Summary: boat battery wiring
checklist
Before the
boating season starts, go through the following:
Cables: Correct
cross-sectional area for the current and length (see sizing table). Fuses: Main
fuse max 20cm from the battery, correct size for the cable. Main switch: Works
properly and is located somewhere easily accessible. Connections: All terminal connectors
tight and protected from corrosion. Documentation: Wiring diagram up to date
and kept on board.
A properly
executed boat battery installation is the foundation of safe boating. By
choosing quality components and following standards, you ensure the electrical
system serves you reliably year after year.
Browse Marinekauppa's range
At Marinekauppa
you'll find all the components needed for wiring a boat battery: boat batteries
and battery accessories, battery cables, fuses, main switches and relays, and
battery chargers. Also check out our articles on solar panel installation and
choosing the right solar panel size to complete your charging system.
Sources
Suomen Purjehdus
ja Veneily ry (Finnish Sailing and Boating Federation) – Electrics and Boats
2024
EN ISO 10133:2017
– Small craft extra-low-voltage electrical systems
Marinekauppa –
Lithium battery features and use on boats
Marinekauppa –
Boat electrics and electrical supplies
|
Component |
Function |
Selection criteria |
|||
|
Battery |
Power source |
Capacity (Ah)
matched to needs |
|||
|
Battery cables |
Current transfer |
Cross-section (mm²) matched to current |
|||
|
Main switch |
Current disconnect |
Current rating (A) matched to system |
|||
|
Main fuse |
Short-circuit protection |
Fuse size
matched to cable |
|||
|
Fuse block or box |
Fuse mounting |
Protection rating (IP rating) |
|||
|
Bus bars |
Current distribution |
Number of connections and current rating |
|||
|
Battery box |
Battery protection |
Battery size and ventilation |
|||
|
Max current (A) |
Cable length under 2 m |
Cable length 2–4 m |
Cable length 4–6 m |
||
|
50 A |
10 mm² |
16 mm² |
25 mm² |
||
|
100 A |
25 mm² |
35 mm² |
50 mm² |
||
|
150 A |
35 mm² |
50 mm² |
70 mm² |
||
|
200 A |
50 mm² |
70 mm² |
95 mm² |
||
|
300 A |
70 mm² |
95 mm² |
120 mm² |
||
|
Feature |
Lead-acid battery (AGM/GEL) |
Lithium battery (LiFePO4) |
|||
|
Charging voltage (12 V) |
14.4–14.8 V |
14.2–14.6 V |
|||
|
Internal protection |
No |
Built-in BMS |
|||
|
Operating temperature |
−20...+50 °C |
0...+45 °C (charging) |
|||
|
Parallel connection |
Unrestricted |
Max 4 units (generally) |
|||
|
Series connection |
Unrestricted |
Per manufacturer's instructions |
|||
Disclaimer
This guide provides general guidance only and does not replace the product manufacturer's operating, installation, or service instructions. Marinekauppa is not responsible for actions taken based on this guide or their consequences. Always check product-specific instructions and consult a qualified professional if needed.