A fishfinder is an electronic device that uses
sound waves to map the underwater world. It sends sound pulses into the water,
measures their return time, and builds a picture on the display of the bottom's
shape, depth, and fish. Fishfinding is based on the same SONAR technology
(Sound Navigation Ranging) that navies have used since the early 20th century.
Modern fishfinders give boaters and anglers a clear view beneath the surface,
significantly improving both safety and fishing success.
What is a fishfinder and what is it used for?
A fishfinder is a
boater's and angler's most important electronic aid for understanding the
underwater environment. The device consists of two main components: the
transducer, which sends and receives sound waves, and the display unit, which
interprets the signals into a visual picture. The transducer is typically
mounted on the transom, through the hull, or on an electric motor shaft,
depending on the boat type and intended use.
A fishfinder's
uses fall into three main categories. The first and most important is measuring
depth, which is essential for safe navigation, especially in unfamiliar waters
and shallow archipelago channels. The second use is locating fish, which makes
fishing considerably more efficient by cutting down on wasted searching time.
The third use is mapping the bottom, which lets you identify interesting
structures such as rock piles, sunken logs, depth changes, and vegetation
areas.
Fishfinders are
used both during the open-water season from a boat and in winter for ice
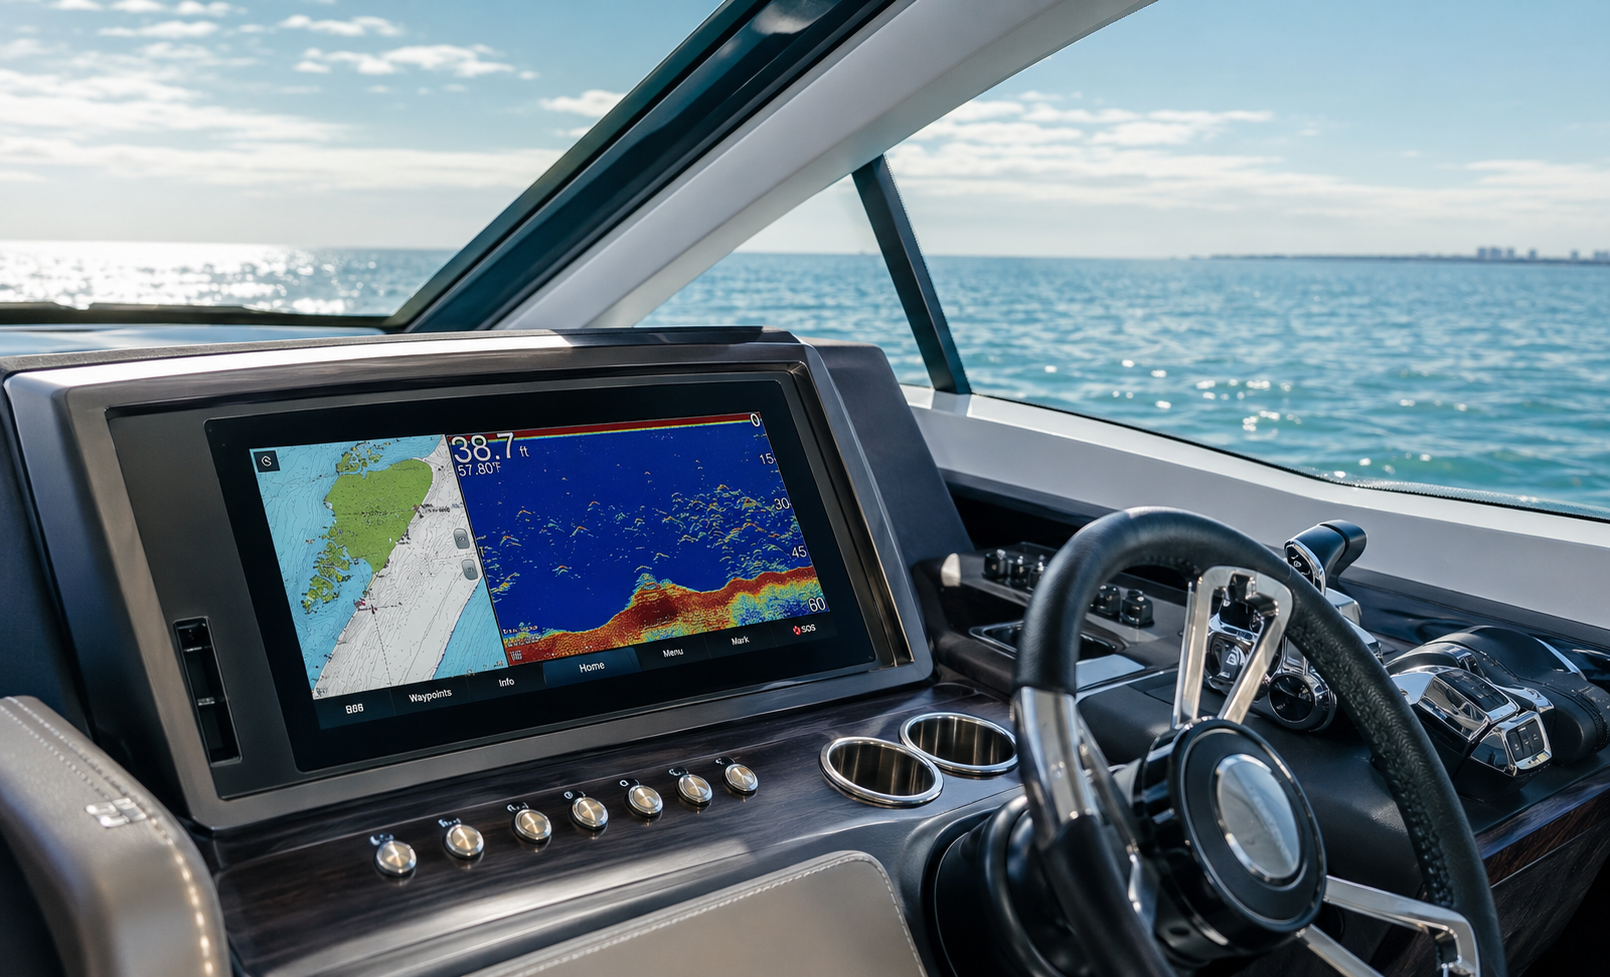
fishing. Modern devices often combine the fishfinder with a chartplotter into a
multifunction display that shows both the navigation chart and the sonar
picture on the same screen. This combination is now the most common solution,
since it gives the best overall picture of the boat's position and the
underwater world.
How does a fishfinder actually
work?
A fishfinder's
operating principle is simple but effective. The transducer converts an
electrical pulse into a sound wave that travels through water at about 1,500
meters per second. When the sound wave hits a target, such as the bottom, a
fish, or vegetation, part of it reflects back to the transducer. The device
measures the signal's travel time and calculates the target's distance using a
precise mathematical formula.
The sonar process
proceeds as follows:
1. The transducer
sends a sound pulse downward in a cone-shaped beam
2. The sound wave
travels through the water and hits targets along the way
3. The reflected
signal returns to the transducer
4. The device
calculates distance based on the elapsed time
5. The processor
builds image data from the signal strength
6. The display
presents the data graphically
On the display,
the picture typically scrolls from right to left, so the newest data always
appears at the right edge. This means that as the boat moves, the screen
continuously draws an updating cross-section of the underwater world. The
faster the boat moves, the faster the picture scrolls.
A fishfinder
scans continuously, so data keeps scrolling across the screen even if the
device isn't moving. To get an accurate picture of the bottom contours, troll
or reel slowly and steadily.
Sound travels
slightly faster in salt water than in fresh water, which has a small effect on
sonar range in different bodies of water. In the lakes and coastal waters most
commonly used in Finland, however, the difference is practically negligible in
everyday use.
Fishfinder frequencies and what
they mean
A fishfinder's
frequency choice has a decisive effect on the kind of information the device
produces. Frequency is given in kilohertz (kHz), and different frequencies suit
different purposes. A low frequency penetrates deeper but produces a coarser
picture, while a high frequency gives a sharp picture at shallower depths.
Fishfinder frequencies are well above the hearing range of both humans and
fish, so they don't scare fish away.
CHIRP technology
(Compressed High-Intensity Radiated Pulse) represents a major advance in sonar.
A traditional fishfinder sends pulses at a single frequency, but a CHIRP unit
sends multiple frequencies simultaneously across a wide frequency band. This significantly
improves target separation and reduces interference. CHIRP frequencies are
typically grouped into three classes: low (under 80 kHz), mid (80–160 kHz), and
high (150–240 kHz).
In devices
equipped with CHIRP technology, such as Lowrance fishfinders, target separation
is significantly improved. In practice, this means you can pick out an
individual fish from a school, or see a jig lure clearly on the display.
Fishfinder transducer types and
installation
The fishfinder's
transducer is a critical component whose correct selection and installation
directly affect image quality. There are several transducer types, and the right choice depends on the
boat's material, shape, and intended use.
A transom
transducer is the most common and easiest to install. It's mounted on the
boat's transom so the transducer face sits at or slightly below the waterline.
A transom transducer is especially suited to outboard-powered boats and smaller
craft. Its advantage is easy installation without modifying the hull.
A through-hull
transducer is installed through the boat's bottom, offering the best possible
image quality since the transducer is in constant direct contact with the
water. This installation method is recommended for larger boats and sailboats.
Through-hull transducers are often made of bronze, which withstands salt-water
corrosion well. Check out Raymarine's transducers, which include a wide range
of through-hull models.
An in-hull
transducer is installed inside the boat's hull, so the signal passes through
the fiberglass or plastic. This is a convenient solution when you don't want to
drill holes in the hull. In-hull mounting, however, isn't suitable for wooden
boats, cored (sandwich) construction, or fiberglass that's too thick, since the
signal won't pass through these materials.
A trolling-motor
transducer is mounted on the shaft of a bow-mounted electric motor and is a
popular solution among anglers. It allows sonar scanning right from the bow of
the boat, which is especially useful for precision fishing. Garmin's transducer
range includes several models suited to trolling motors.
Pay special
attention to correct transducer installation. An incorrectly installed
transducer causes interference in the sonar picture, especially at higher
speeds. The transducer must not be positioned at a strake or in the path of air
bubbles. See our fishfinder installation guide, which helps you avoid the most
common installation mistakes.
How do you read a fishfinder
display?
Reading a
fishfinder display takes practice, but you'll pick up the basics quickly with
hands-on experience. The bottom appears at the lower edge of the display, and
its thickness and color indicate how hard the bottom is. Fish typically appear
as arches or lines, depending on the boat's speed and the fish's movement
relative to the sonar beam.
Fish arches form
when a fish swims through the cone-shaped sonar beam. The shape and thickness
of the arch give clues about the fish's size: a thicker, taller arch generally
means a bigger fish. If a fish only swims through the edge of the beam, only a
partial arch or a plain line appears. Complete arches require the fish to swim
through the entire beam at a suitable boat speed.
Fish symbols, or
automatic fish identification, are generally best switched off. The device easily mistakes aquatic plant leaves, air bubbles, or other
targets for fish, leading to false readings. Learning to interpret the raw
sonar data teaches you to read the fishfinder more effectively and gives a more
accurate picture of what's happening underwater.
On a color display, target strength is shown
in different colors. Generally the strongest returns appear red or orange,
medium-strength ones yellow, and the weakest ones blue. This helps distinguish
hard targets from soft ones, and big fish from small ones.
Adjusting sensitivity and depth range
A fishfinder's most important setting is
sensitivity (also called gain), which controls how readily the device registers
returns. Getting sensitivity
right is key to a clear sonar picture, and it varies with depth and conditions.
The basic
principle is: the shallower you're fishing, the lower the sensitivity should be
set. As you move into deeper water, sensitivity can be
increased. A good sensitivity level for ice fishing is typically in the range
of 50–75%, depending on depth.
A practical method for adjusting sensitivity:
lower your lure to mid-water and adjust sensitivity so the lure appears as a
thin line on the display. With sensitivity too high, all targets are drawn in
the same strong color, making it hard to tell sizes apart. Excess noise and
interference also appear on the display. With sensitivity too low, even small
fish go undetected.
It's generally best to set the depth range
manually rather than using automatic mode. If you're ice fishing at, say, seven
meters, set the depth range to 10 meters. Automatic depth range can mistake a
dense school of fish for the bottom, causing the display to jump distractingly
between two depths. Manual adjustment gives a steadier, more reliable picture.
Other useful settings include scroll speed,
which affects how quickly the picture updates, and the color palette, which can
be changed to suit conditions. In bright daylight, a higher-contrast color palette works better.
Interpreting bottom composition
from a fishfinder
Besides depth, a
fishfinder also tells you about bottom composition, which is valuable
information for anglers. The thickness and color of the bottom line reveal
whether the bottom is hard or soft material. A thick, strongly colored bottom
line indicates a hard bottom such as rock, gravel, or hard clay. A thin, paler
line suggests a soft, muddy bottom.
Identifying
bottom type matters for fishing, since different fish species favor different
bottoms and structures. Perch often prefer hard bottoms near rocky areas, while
bream favor soft, muddy bottoms while foraging. Pike-perch typically hunt along
the borders between hard and soft bottoms, where smaller fish move.
Vegetation
appears on the fishfinder as vertical lines or an indistinct mass above the
bottom. Telling vegetation apart from fish can be tricky at first, but on a
color display they usually show up in different colors. Plants often appear
greenish, while fish show up yellow or orange. Baitfish schools often appear as
clouds or dense clusters in mid-water.
Sunken logs, rock
piles, and other structures appear as distinct shapes on top of the bottom.
These are often the best fishing spots, since they offer fish shelter and food.
Choosing the right fishfinder
Choosing a
fishfinder requires considering intended use, boat size, and budget. In the
under-€300 price range you get a simple basic unit suited to occasional fishing
and depth monitoring. These models typically have a smaller display and
traditional frequencies without CHIRP technology.
In the mid-range
€300–800 models, you already get CHIRP technology, a larger display, and often
integrated GPS. This price range suits active anglers who want a more versatile
device. Garmin fishfinders include several popular models in this range.
In units over
€800 you get access to top-tier technology, such as DownScan and SideScan
imaging, large touchscreens, and networking with other devices. Raymarine's
multifunction displays represent this professional tier.
Ice-fishing kits
are available separately for winter fishing, typically including a small
portable unit, a battery, and an ice transducer as a ready-made package.
The most common usage mistakes
in fishfinding
Using a
fishfinder effectively means avoiding a few common mistakes. These issues come
up especially often with beginners, but recognizing them helps you improve
faster.
1. Going too
fast: At high speed, air bubbles (cavitation) form under the transducer,
disturbing or completely blocking the sonar picture. The depth reading may disappear, and interference
lines appear on the screen. Slow down if the sonar picture drops out or becomes
disturbed.
2. Wrong
sensitivity setting: Sensitivity that's too high shows excess noise and false
fish readings. Sensitivity that's too low leaves real fish and structures
invisible. Actively adjust sensitivity to match depth and conditions.
3. Using the
fish-symbol feature: Automatic fish identification interprets almost anything
as a fish, leading to unrealistic readings. Turn off fish symbols and learn to
read the raw sonar data.
4. Incorrectly
installed transducer: Transducer installation mistakes are the most common
cause of a poor sonar picture. The transducer must not be positioned at a
strake or in the path of air bubbles, and it should be level with the boat's
bottom. Study the installation instructions carefully.
5. Automatic
depth range: A dense school of fish or vegetation can confuse automatic depth
range, causing the display to jump around uncontrollably. Use manual depth
range for a steadier picture.
6. Understanding
beam angle: A fishfinder shows all targets within the cone as a two-dimensional
picture. A wide beam angle covers a large area but places targets at the same
level even if they're actually off to the side of each other. This can lead to misjudging
a fish's exact location.
Frequently asked questions about
fishfinders
What is a CHIRP fishfinder and
how does it differ from a traditional one?
A CHIRP
fishfinder transmits multiple frequencies simultaneously, while a traditional
unit uses only one frequency. This significantly improves target separation:
with CHIRP technology you can distinguish individual fish from a school, or see
near-bottom targets much more clearly. CHIRP is now a standard feature on
almost all modern units.
How deep can a fishfinder reach?
Maximum depth
depends on frequency and the unit's power. Low-frequency (50 kHz) professional
sonar units can reach as deep as 750 meters, while typical recreational units
at 200 kHz work reliably down to about 150 meters. In Finnish lakes and coastal
waters, a depth capacity of around 200 meters is generally more than enough.
Can a fishfinder identify fish
species?
A fishfinder
doesn't directly tell you the fish species, but an experienced user learns to
recognize species from their typical behavior and how they appear on the sonar
picture. For example, pike-perch typically appear as single arches near the
bottom, perch as smaller schools near rocky structure, and pike as a large
single target in mid-water or at the edge of vegetation.
Does a fishfinder work for ice
fishing in winter?
Yes, it works
excellently. Many fishfinders
are also designed for ice-fishing use with a separate ice transducer.
Ice-fishing fishfinder kits usually include a battery, a carrying case, and an
ice transducer. In winter, a fishfinder is especially useful because you can
see fish reacting to your jig in real time and adjust your technique
accordingly.
What's the difference between
DownScan and SideScan sonar?
DownScan scans
straight down and produces a photo-like, detailed picture of the bottom and
structures directly under the boat. SideScan, or side-imaging sonar, scans to
the sides and shows a wider area on both sides of the boat, out to as much as
180 meters. Both technologies complement traditional sonar and are especially
useful for finding structures and fish over large areas.
How do you maintain a
fishfinder?
Maintaining a
fishfinder is simple. Clean the transducer regularly with a soft cloth and
fresh water, especially after use in salt water. Check the transducer mount at
the start of the season. Update the device's software from the manufacturer's
website, since updates often improve performance and add new features.
Fishfinders from Marinekauppa
A fishfinder is
an essential tool for every boater and angler who wants to understand the
underwater world. Used correctly, it improves both navigational safety and
fishing success. The key is learning the device's settings and how to read the
display, since simply owning the unit doesn't guarantee results – skill comes
through practical experience.
In Marinekauppa's
extensive range you'll find quality fishfinders from leading manufacturers such
as Lowrance, Garmin, and Raymarine. A wide transducer selection makes it easy
to find the right solution for every boat. Also see our fishfinder installation
guide, which helps you get the most out of your unit.
Sources
Totalvene.fi –
Introduction to sonar technology
Garmin – How
CHIRP technology works
Lowrance –
Fishfinder user guide and transducer technical data
Deeper Sonar – Guide to interpreting your
fishfinder
|
Frequency |
Beam angle |
Depth range |
Best use |
|
50 kHz |
35–60° |
Up to 750 m |
Deep-water fishing, wide-area sonar |
|
83 kHz |
40–60° |
Up to 400 m |
General use, deep-lake fishing |
|
200 kHz |
10–20° |
Up to 150 m |
Sharp imaging, separating individual fish |
|
455 kHz |
3–10° |
30–60 m |
DownScan imaging, structure identification |
|
800 kHz |
3–5° |
20–40 m |
Very precise
structure and fish identification |
Disclaimer
This guide provides general guidance only and does not replace the product manufacturer's operating, installation, or service instructions. Marinekauppa is not responsible for actions taken based on this guide or their consequences. Always check product-specific instructions and consult a qualified professional if needed.